
Gear That Gives You Access

Photo and text by: Annalise Kaylor
When we think about upgrading our photography equipment, most of us jump to thinking about a new camera or lens. Yet some of the easiest ways to elevate your work have absolutely nothing to do with either of those two pieces of equipment and everything to do with changing how you see and access a photography situation.
Last September, itching to take our recently acquired 32-foot travel trailer on a longer trip, we made our way to the Smoky Mountains to photograph elk. Though we were past the peak of the rut, there were a handful of other ideas we wanted to give a try.
If you’re photographing elk in the Smokies, you’re likely going to Oconoluftee or Cataloochee. I really wanted to capture elk crossing the water, so we started out at the river behind the Oconoluftee Visitor’s Center. Our friend and client, Kathy, had given us the head’s up that the rangers were being particularly protective of the area this year. She said that they were pushing the elk back to a less populated (and not-so-photogenic) part of the park. Boy, she wasn’t wrong.
When we pulled up the night before our first shoot to scout the situation, we saw exactly what Kathy had warned us about. A lot of visitors in the parking area and at the field meant that rangers and volunteers were shoeing people out of public areas and herding the humans into places that were anything BUT good for photos; I don’t want photos of an elk grazing on the meticulously kept lawn around a visitor’s center.
We went out before sunrise the next morning, unsure what the situation would be. The first thing we did? Donned our chest waders. Or, as Jared likes to call them, “the adult onesie.”
Waders are a piece of gear that every wildlife photographer should have in their kit. They serve myriad purposes beyond staying dry while standing in the water. They aid in keeping you warm in the wind and they keep you clean when you’re working in dirty conditions.

These reasons are precisely why we require clients on our Alaska coastal brown bear workshops to bring waders - nothing is better than coming in for lunch after a cold, wet morning of bear photography and only needing to slip out of waders to be “cleaned up” for lunch. It also allows us to go places other visitors and workshops, in which photogs only wear muck boots, cannot go. Simply adding waders unlocks a much bigger world of opportunities and options.
Right: A cell phone photo of our workshop group in Alaska in 2022.
Walking through the parking lot and down to the river, we set up on the edge of the water. We looked for the backgrounds that worked. We eyed different game trails that signaled where the elk would likely cross. We found the best spots to sit in the water that gave us the highest likelihood of executing the vision each of us had for our photography.
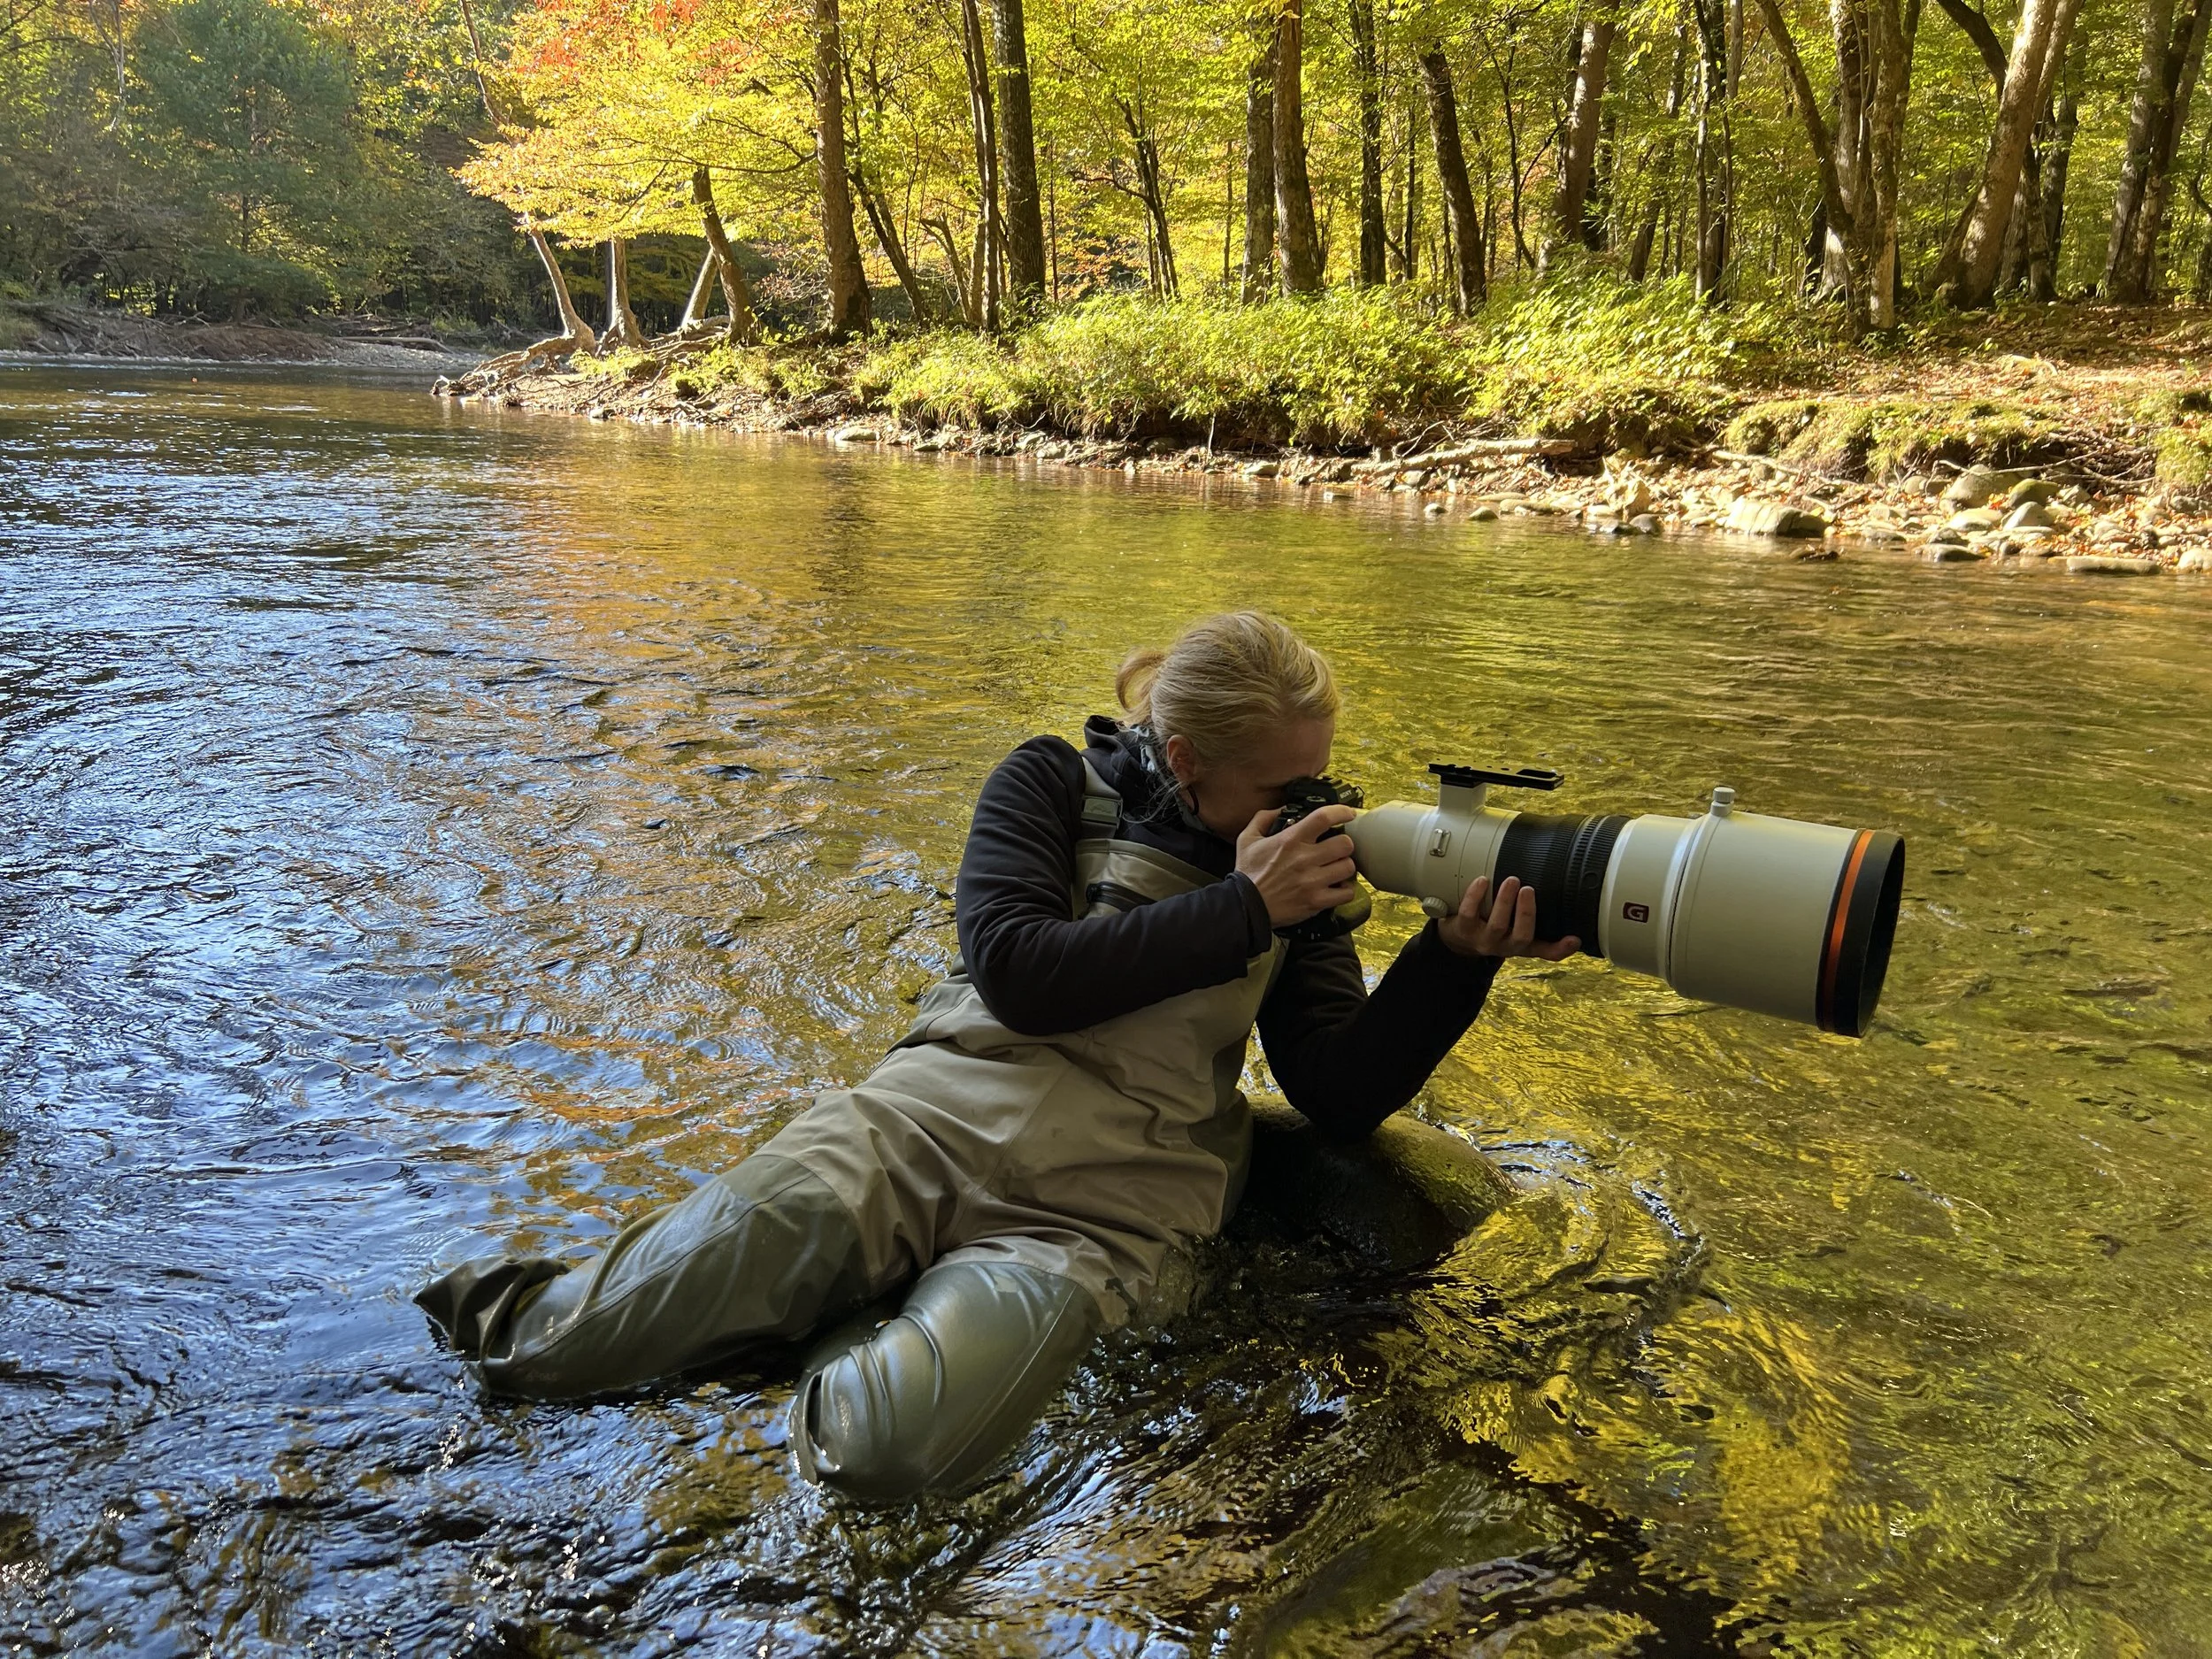
Annalise in her waders, working in the water to avoid the other people and photographers down river.
Not only did waders allow us to move into a position we wanted, it meant that we didn’t have to compose our photographs around the eleventy billion photographers and tourists who were all jockeying for a spot on the shoreline. When you’re working in populated areas, which we all need to do from time to time, an ancillary piece of gear like waders can give you access that no one else has. This helps you create images that no one else is creating.

If we had stayed on the shoreline, we would have been competing for a spot with all of the other photographers and tourists, as seen here. Waders, which put us in the middle of the water, provide an advantage because we are no longer relegated to working only the sidelines. Photo by: Annalise Kaylor
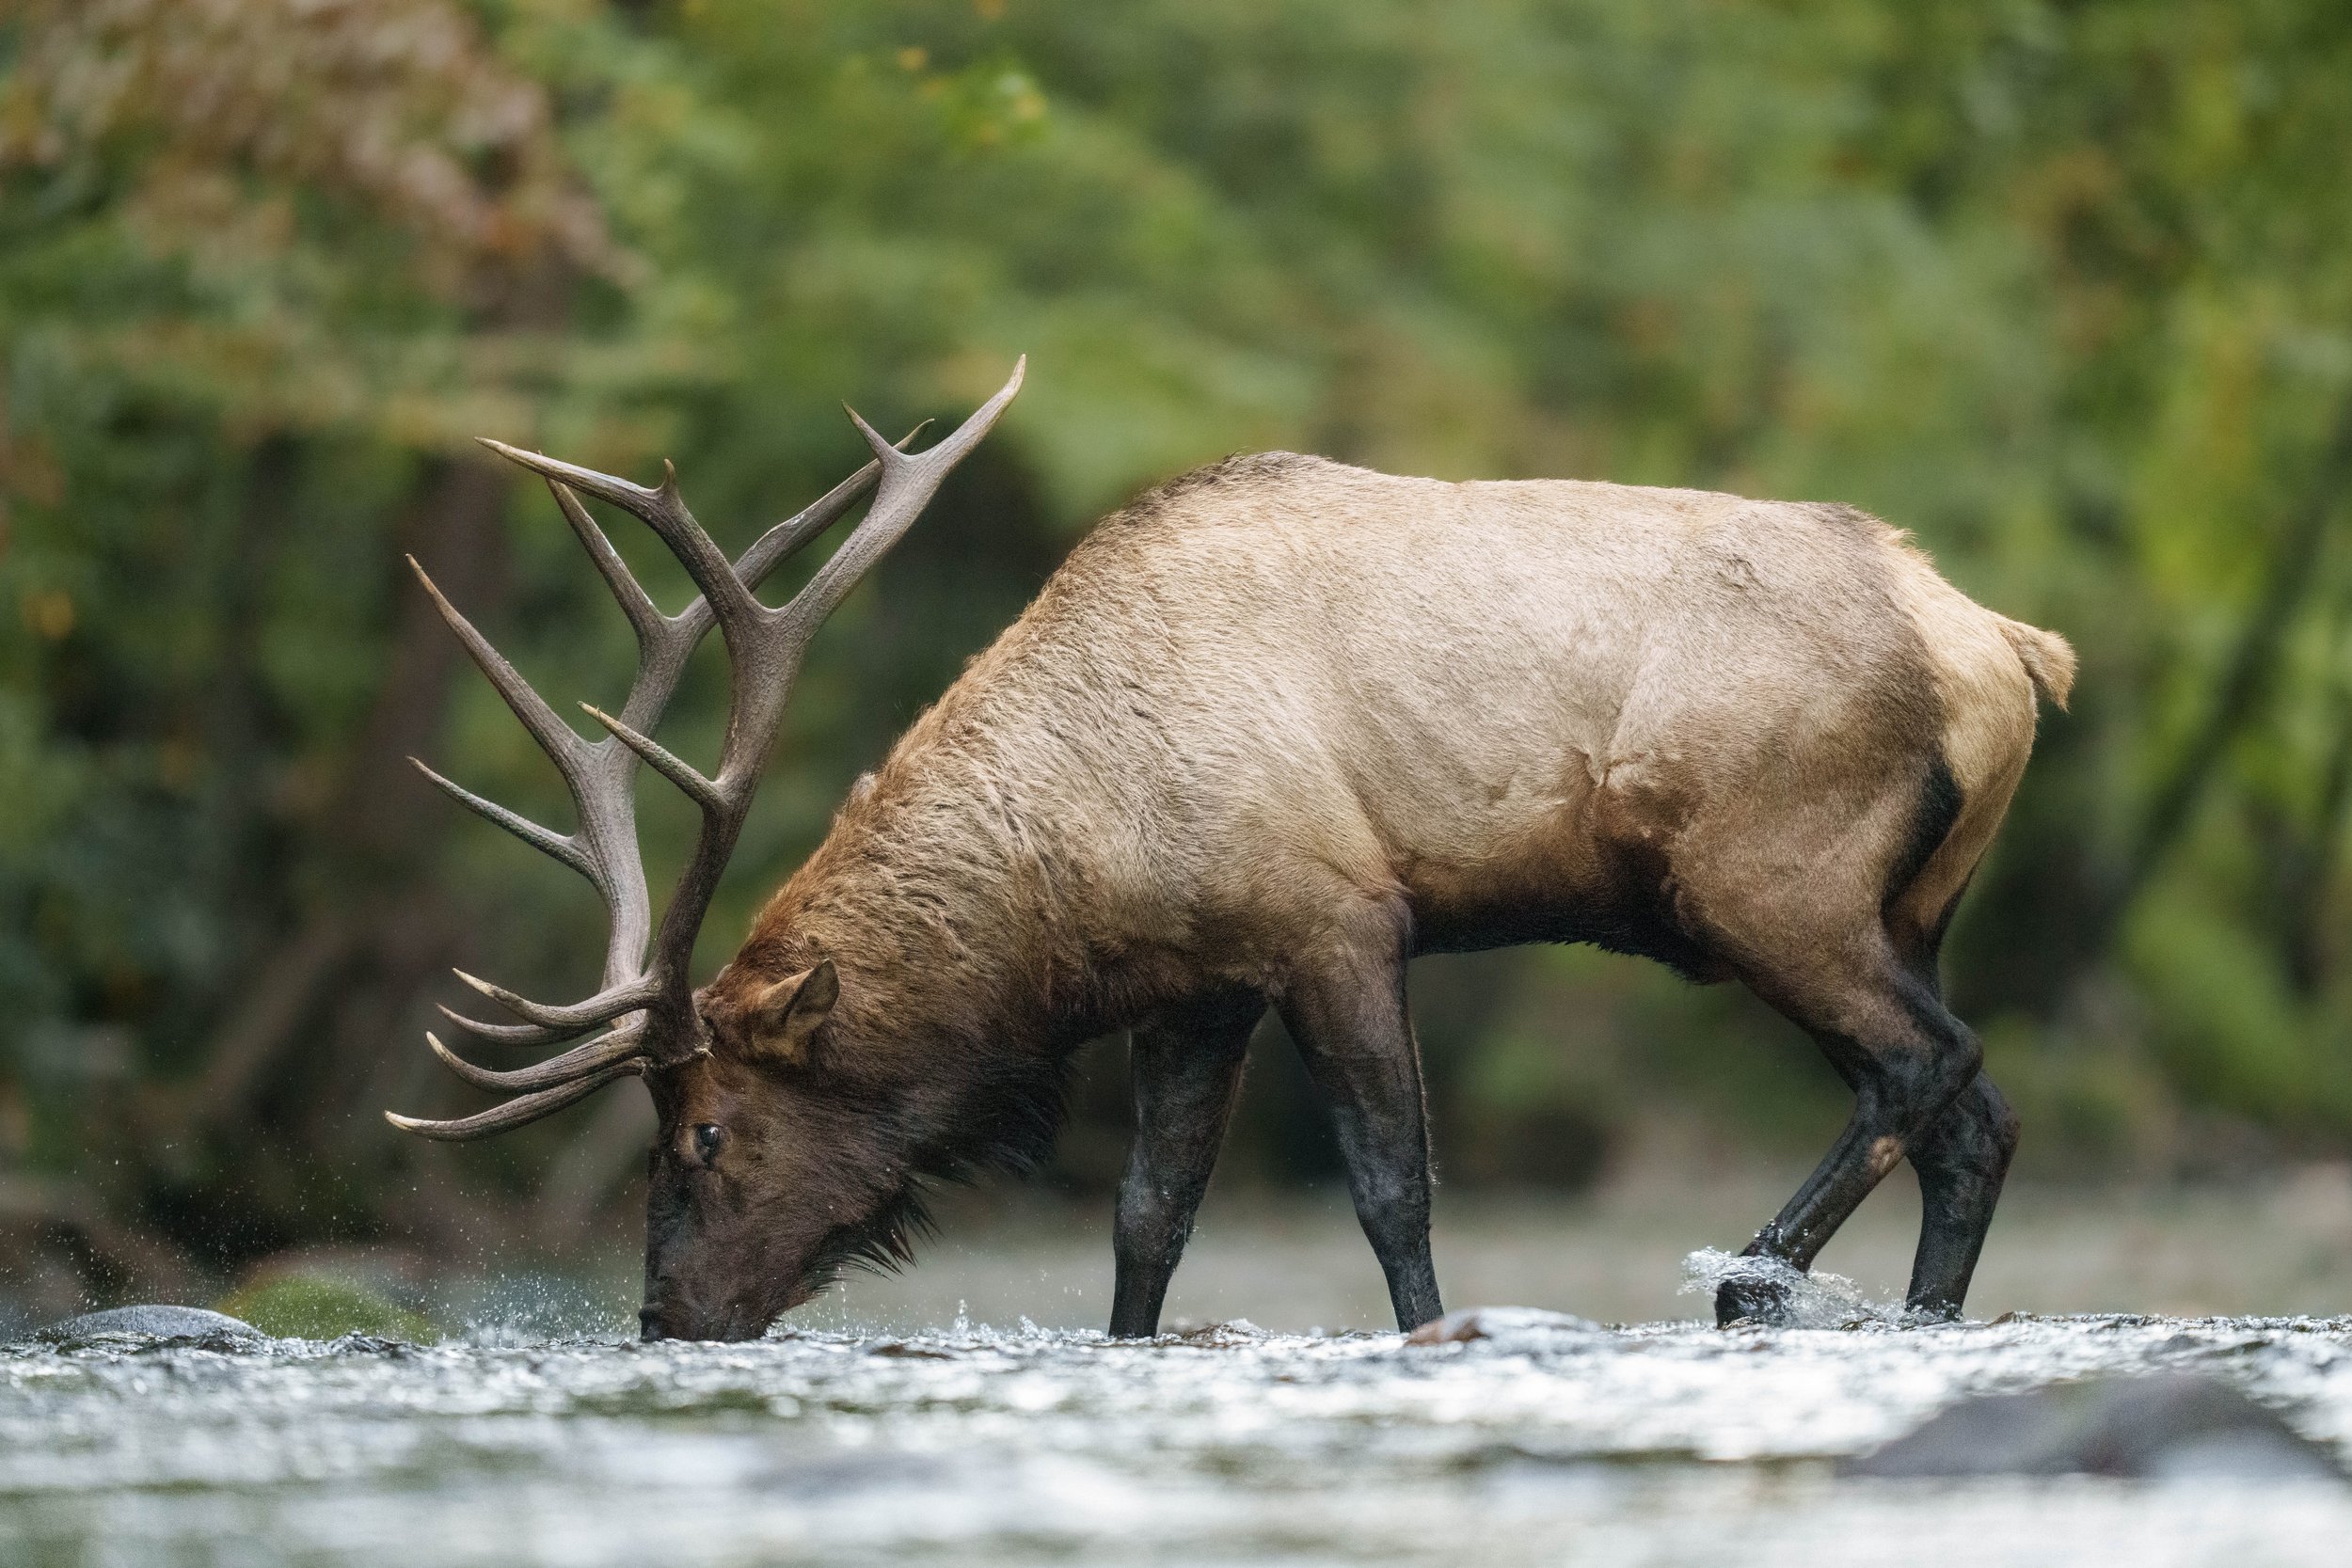
I ended up not getting the shots I wanted from this particular crossing, but I saved this photo for illustrative purposes. The people from my previous photo are still there, but I’m no longer working around them. While I could potentially sell this image on a stock photography website, this is one of those images that I’ll never put up there. There are a handful of things that make this image one destined for deletion. This is a boring shot. Nothing exciting here. Photos of wildlife with their heads down eating or drinking are about as appealing and interesting as photos of humans eating or drinking. The back leg kicking up is distracting and out of place. Had the bull pulled up and looked at me with water dripping from his mouth - that I’d have kept. Otherwise, this is nothing more than a snapshot. Photo by: Annalise Kaylor
That’s what this really boils down to - creating access to create something different. If your social feeds are anything like mine, it’s obvious when several photographers have all been lined up together making the exact same photo from what is essentially the exact same spot. There’s nothing wrong with this, but you still have to see the scene differently than the people around you if you’d like to create something unique. This is why Jared and I create completely different photographs despite often being mere inches apart.
Jared and I both wear Simm’s waders for anything where we don’t need neoprene waders. They are high quality and hold up to our level of use. Both of us also opt for the version with our wading boots separate because I prefer a more supportive shoe/boot I can spend hours in. While Simm’s are on the higher-end side, prices are a bit all over the place and you can pick up waders at virtually any store where fishing gear is sold. I highly recommend trying them on whenever possible first.
Another all-time favorite piece of gear that we both carry with us is the Naturescapes Skimmer Ground Pod. Simply add your tripod head and go.
Again, this is about changing your access to an opportunity and getting down low. Can you do this with your tripod? Sure, and that’s exactly why we both use and recommend tripods without a center column. But there are some drawbacks to using a tripod that the skimmer pod solves.
First, the pod is MUCH smaller. I don’t like using my tripod unless it really is the best tool for the job. I don’t always want to manage a tripod when I’m working. The pod is like a large dinner plate, so it’s incredibly easy and light for toting around and it even has a nice little tab that allows me to hang it on my pack with a carabiner.
We use our cameras A LOT in the sand and dirt. I, for one, loathe cleaning the sand out of my tripod. This is where the skimmer pod really shines. It slides easily along the sand and I don’t have to worry about grit getting into any tiny crevices. It’s easy to pick up and move, too, which isn’t always the case with tripods.
Perhaps the best benefit of the pod, however, is its point of view. It gets even lower than my tripod, and getting down low is one of the easiest ways to improve your wildlife photography. Take a look at the examples below from Jared. The first one is standing up, and the second one is a few seconds later, simply from the ground.

This photo was taken while standing up. Photo by: Jared Lloyd

The exact same subject. The only difference is that it was taken about five seconds later and from the ground in the same exact spot. Photo by: Jared Lloyd
What a difference!
Now I recognize that getting on your belly or down low isn’t something everyone can do. My suggestion for those situations is to bring a camp chair. If you could take the shot standing, then you can likely take it while sitting, too. Even a few feet lower than standing can dramatically improve a photograph - it gives you more foreground to work with and makes your subject more powerful, for example.
Remote shutter releases are a great tool if you’re sitting and can’t manually release the shutter for the shot. Most of the newer mirrorless cameras even allow you to trigger your camera remotely with an app on your phone, simply using the bluetooth connection.
Last year, Jared and I were photographing some fast-moving endangered red-cockaded woodpeckers. Because we were photographing a sensitive species, we were using our Roofnest on top of a vehicle as our blind. This allowed us to stay hidden at a respectful distance. But it also created a couple of blind spots that made it difficult to see the woodpeckers flying into the cavity. Our cameras were locked onto the composition each of us wanted, so all that was left was getting the shots.
We turned to using our remote shutter releases to help us out. We each could keep our hand on the remote and then watch out our respective windows for the woodpeckers as they made their way into our frame. One of us would cue the other that a bird was coming and we engaged the remote releases to do the rest of the work.
If photographing animals or birds in the water is part of your work, then I cannot recommend a floating hide (blind) enough. Sure our Roofnest works well for getting eye level with woodpeckers, but it’s not going to do us any good when we shift to photographing water fowl. For this, we use floating blinds. Jared has one from Mr. Jan Gear and mine is a different style from a company out of Austria that opted for the remarkably literal name of: Floating Hide.
The floating hide allows you to get in the water with your lens nice and low to the water. Anyone who has been with us to photograph the wild horses on the coast of North Carolina knows that we get out of the boat and right into the water with our tripods and gear. Same for those who’ve been with us in Florida - we go all in. Sure it takes a few minutes to calm the voice shrieking, “OMG OMG I’m in the water with my 400mm lens!” But once you’re in and you see the incredible difference that being IN the water makes, you’ll never go back to standing on land again if you can help it.
The chest waders will come in handy here, too. If the water is a touch cold, the waders will make that a lot more comfortable. Similarly, I wear my waders into the water with my floating hide when I’m not going in too deep. If I needed to work in water that was past my waist, I’d wear a wetsuit instead. The last thing you want is for water to fill up your waders and create a life or death situation.
When you’re thinking about upgrading gear, don’t just think about the obvious. When you see photos you think are amazing, take the time to dissect “how” it was made. Did they kayak in? Was this likely in a blind? How low to the ground or water did they get? What would I need to create a similar look to my work? It’s this level of detail and thoughtfulness that elevate your images and get your work noticed.